
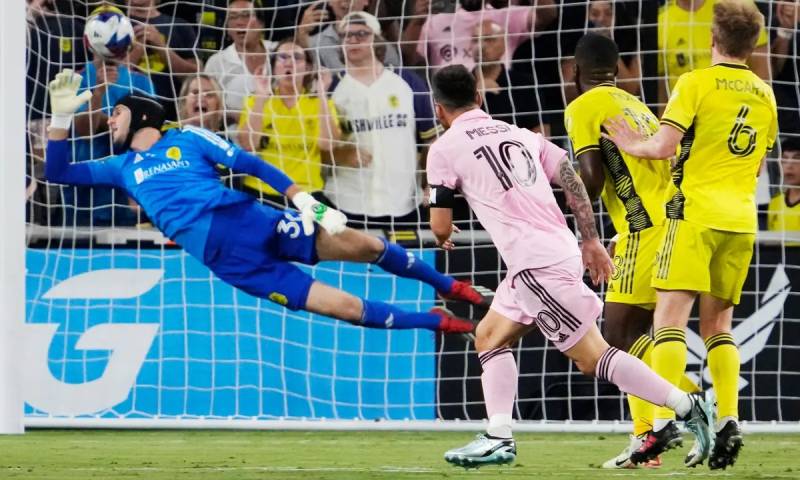
Nhận định lịch sử Inter Miami đấu với Nashville như thế nào? Phong độ của hai đội hiện tại ra sao? Đây là thông tin mà các fan hâm mộ rất quan tâm khi theo dõi hai đội đấu với nhau. Vậy nếu anh em soi kèo hai đội này nên tìm hiểu các thông […]

29
Mar
Mar
Khi soi kèo trận đấu Inter Miami đấu với Houston Dynamo, anh em cần phải nắm được các yếu tố nhận định để đưa ra đánh giá đội nào đang chiếm ưu thế. Vậy thành tích đối đầu của hai đội bóng này như thế nào và phong độ thi đấu hiện ra ra sao? […]
29
Mar
Mar
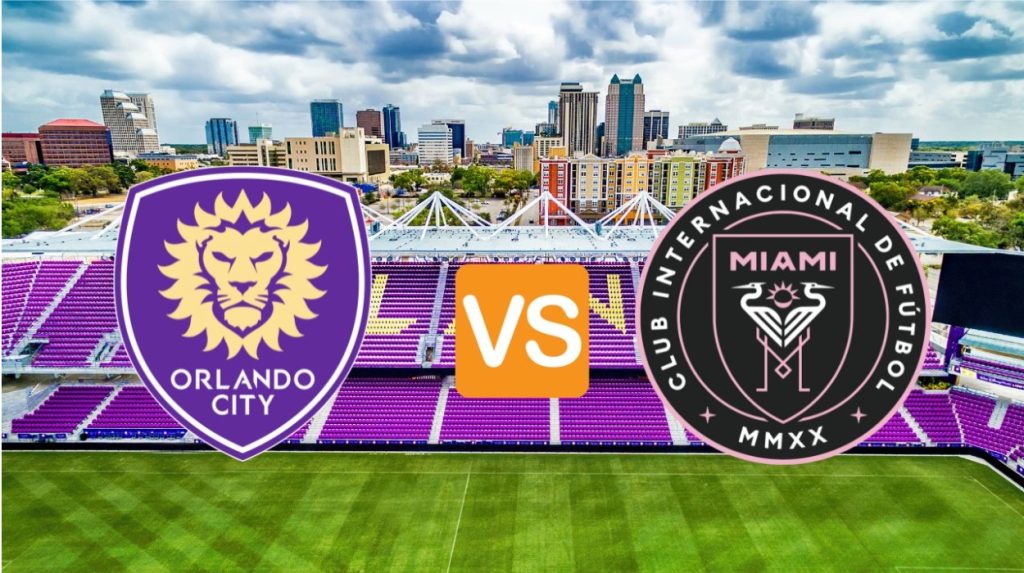
Thông tin soi kèo trận đấu Inter Miami đấu với Orlando City đang được nhiều người hâm mộ tìm hiểu. Vậy hai đội bóng này đối đầu nhau, Inter Miami hay Orlando City được đánh giá có phong độ thi đấu tốt hơn? Mời anh em theo dõi bài thông tin nhận định soi kèo […]

29
Mar
Mar
Inter Miami đấu với Charlotte, đội bóng nào được các chuyên gia bóng đá đánh giá cao hơn? Phong độ thi đấu ở thời điểm hiện tại của Inter Miami và Charlotte như thế nào? Để giúp anh em giải đáp được những vấn đề này và đưa ra được lựa chọn đặt kèo chính […]

29
Mar
Mar
Chelsea đấu với Dortmund là một trong những trận đấu kịch tính thu hút nhiều người chơi tham gia cá cược cũng như theo dõi trận đấu. Hiện tại hai đội đang có thành tích đối đầu như thế nào và phong độ được thể hiện ra sao? Anh em hãy cùng VeboTV theo dõi […]
29
Mar
Mar
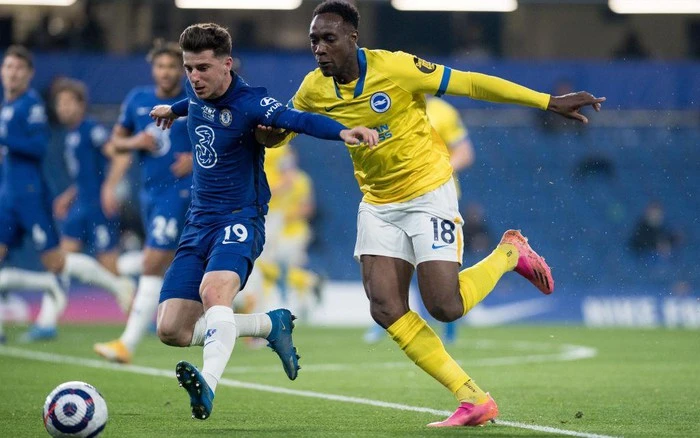
Để có thể soi kèo Chelsea đấu với Brighton người chơi cá cược sẽ phải đưa ra 1 số yếu tố và nhận định chúng xem đội nào đang có ưu thế lớn hơn. Về danh tiếng cả 2 đội có thể có 1 chút chênh lệch nhưng về thành tích và phong độ thì […]

29
Mar
Mar
Chelsea đấu với Brentford thì bên đội bóng nào sẽ chiếm được nhiều ưu thế hơn? Đây là một câu hỏi mà nhiều cược thủ đưa ra khi nhắc đến trận đối đầu giữa 2 CLB này. Tham khảo các thông tin cần thiết cho việc soi kèo hai đội thông qua bài viết bên […]
29
Mar
Mar
Sắp tới đây người hâm mộ NHA sẽ được theo dõi cuộc chạm trán giữa Chelsea đấu với Luton. Mặc dù về danh tiếng thì cả 2 rõ ràng có sự chênh lệch thế nhưng về phong độ và những lần chạm trán trước đó của họ của thực sự chênh lệch hay không? Anh […]

29
Mar
Mar
Trận cầu West Ham đấu với Chelsea được rất nhiều người hâm mộ đón chờ hiện nay. Nhất là khi cả hai đội đều có thực lực tương đương, có thể đem đến sự kịch tích trong trận đấu đối đầu. Nếu bạn muốn soi kèo hai CLB này thì có thể tham khảo thêm […]

29
Mar
Mar
Việc soi kèo West Ham đấu với Leeds là vấn đề được rất nhiều cược thủ quan tâm hiện nay. Tuy vậy đây không phải là điều dễ dàng, nhất là với những cược thủ mới. Bạn có thể cân nhắc và tham khảo thông tin giữa hai CLB dưới đây của VeboTV để soi […]